Read-Only Archive โ€” 68,067 posts ยท 4,889 threads ยท 2,978 members ยท preserved from 2006โ€“2015
back halfed buggy
#1
Well,
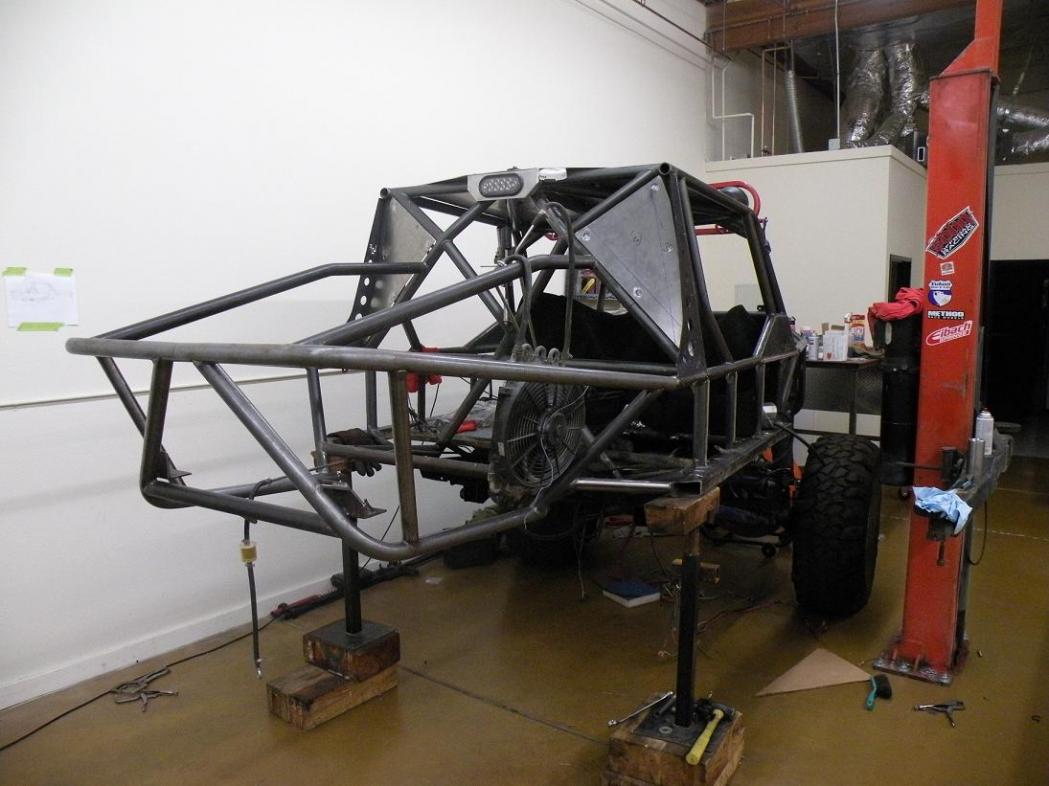
i got a shop 2 months ago so i decided to change the rock limo up a little. first off i want to say that 132"wb is not a bad thing. i have ran a ton of trails with it and it all comes down to seat time. i have only driven a 132"wb rig. ive wheeled it for 8+ yrs. from full bodied truck to full tube chassis buggy.

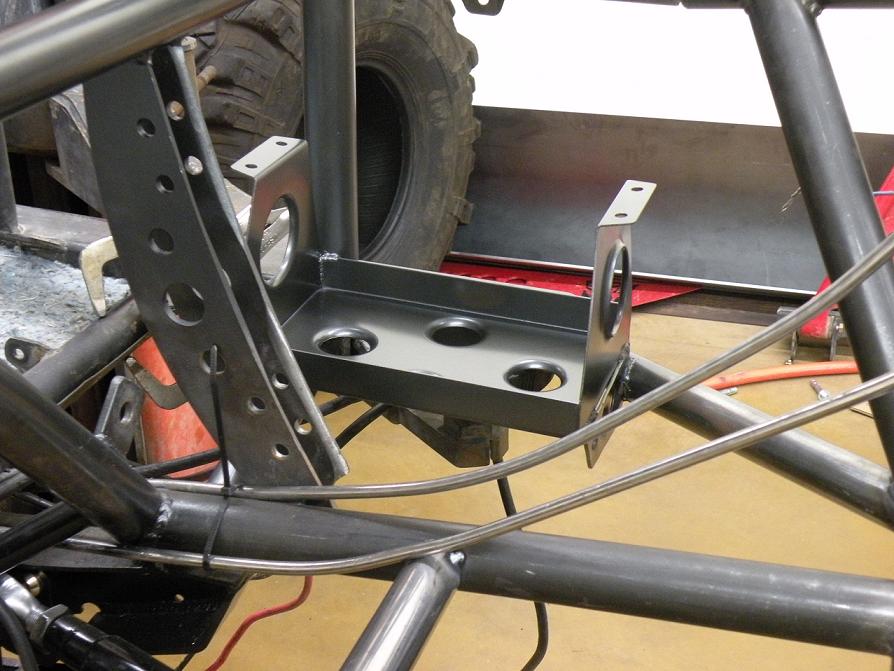
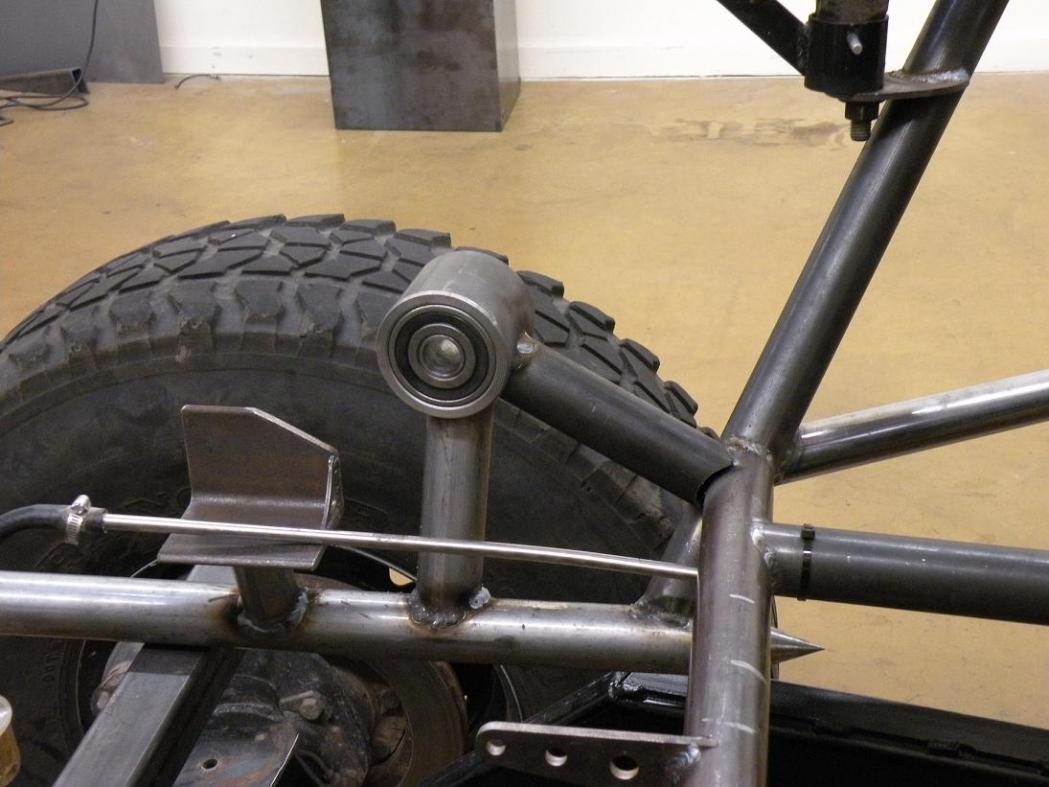
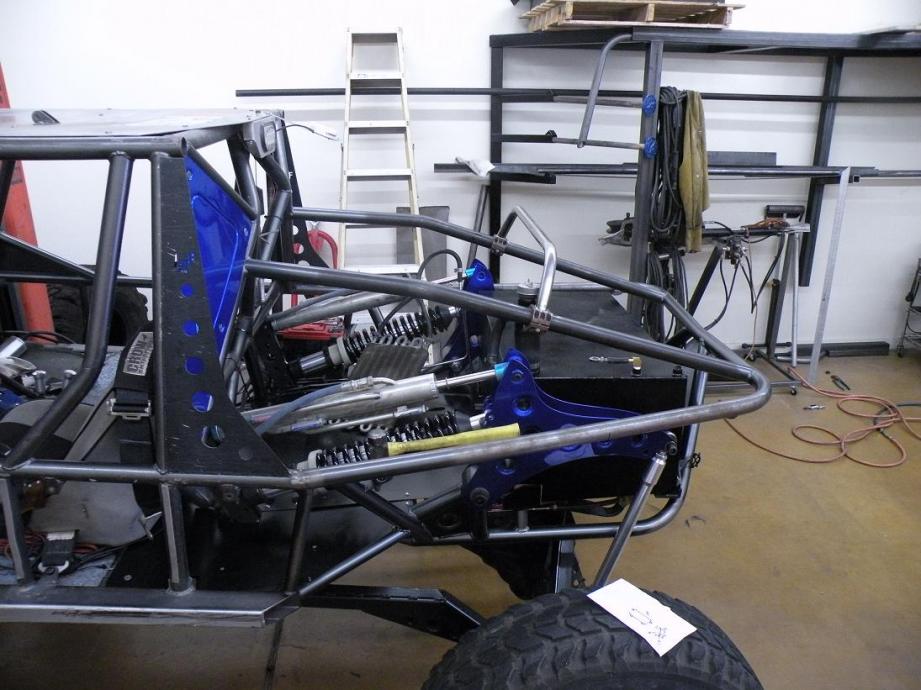
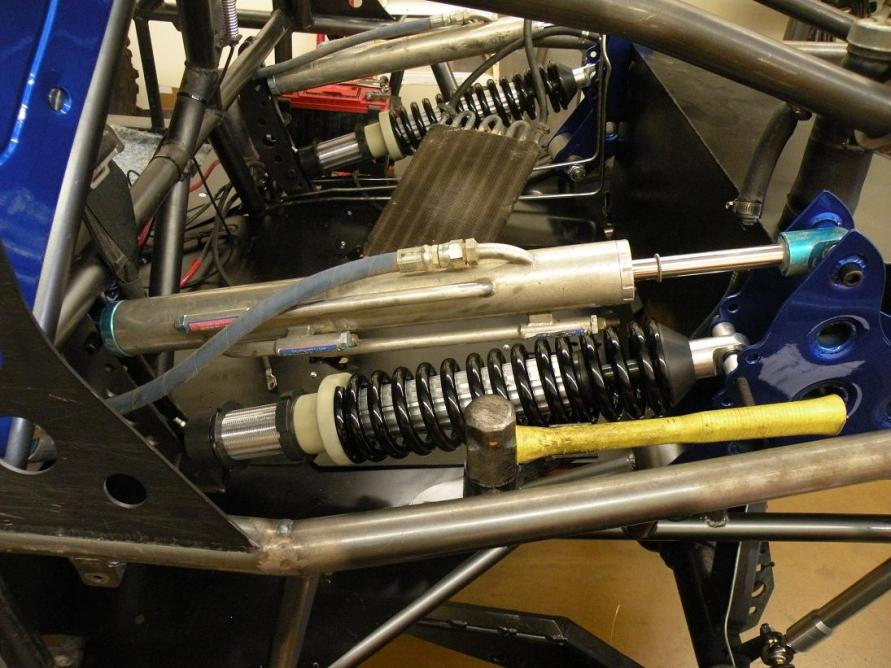
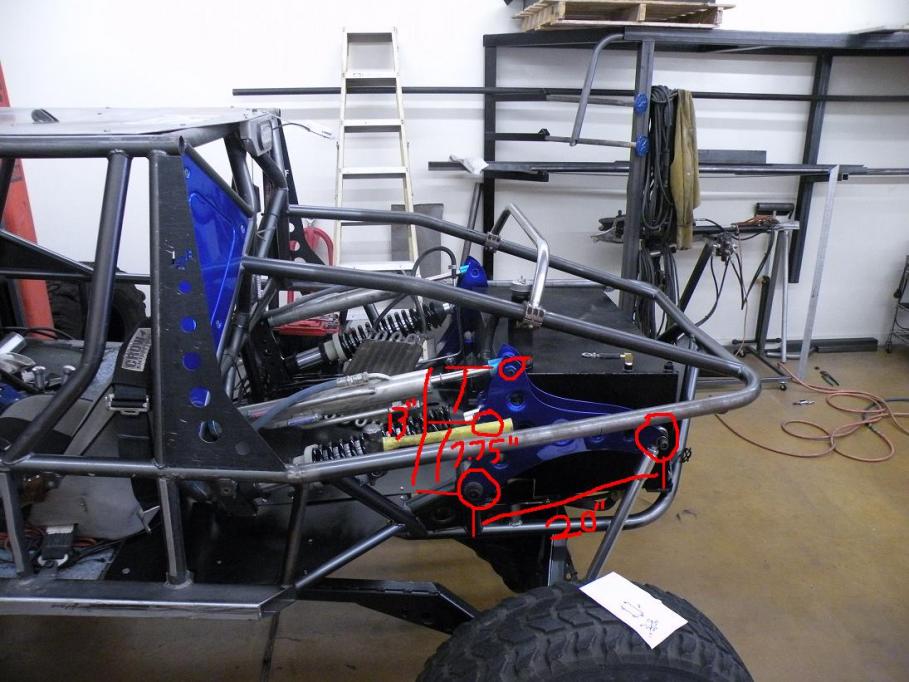
so on to the build. i was originally going to cut the back off the buggy and just take the link setup i had and move it forward 20". that didnt work out quite how i wanted so i had to go with a couple revisions along the way. first thing i changed was the link setup. i went from a trailing arm/ upper wishbone setup(super stable) to a true 4link. next i wanted to mount my coilovers/bypass shocks up on the trailing arms for my goal travel of 25" in the rear. that didnt work out since my trailing arms are bent up. they would have collapsed sideways with the force of the shocks on them. so i went with a more time consuming cantilever setup(way happy with this decision). heres a few pics of the buggy now. its mostly done now except for some little details im finishing up.

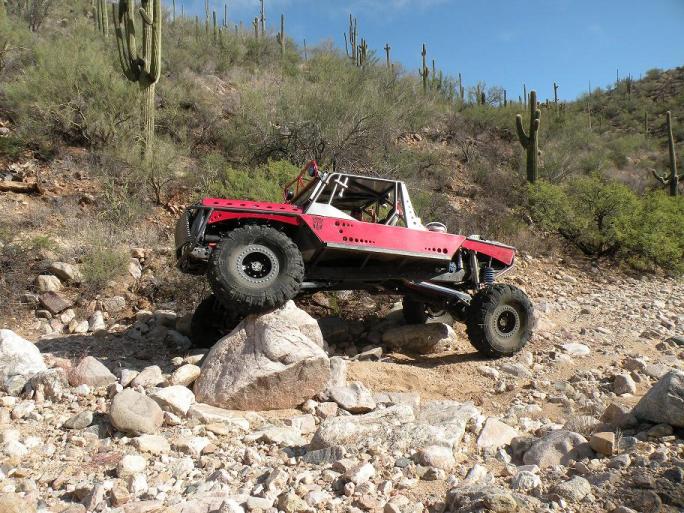
the first pic os a recent view of what it used to look like.

feel free to ask questions. it pushed me to the next level that i was aiming for fab and design wise. enjoy

attachment

attachment

attachment

attachment

attachment
#2
Chris, It looks great! I'm loving the new color too.

Can't wait to see it flexed out.
#3
I may know know everything I'm seeing but I do know that's some beautiful fab work Chris.
So want to see that on the trail now
#4
That looks absolutely sexy. I want more pictures :) And I think we need to do another run soon! Amazing work Chirs, amazing.
#5
looks good man, as usual things changed five times since i was there a week ago... lol... i know how that goes. i love the dimple die sheet metal work.
#6


okay being that I have almost zero idea on buggy design, how exactly is that back suspension going to work? The coils are sideways?
#7
it's a cantilever system....

the shock mounts to the big blue cantilever. if you look at the cantilever it has a pivot point in the center to rock back an forth on & the rear most section of it has the linkage are that connects to the trailer arm... most of the newer dirt bikes use a similar system with the monoshocks
#8
heres another view of the cantilever setup. theres a 1" allen bolt at the bottom of the bellcrank arm that is the pivot point. by going with this design you can get more travel out of a certain length shock. i m using the 16" bypass on top as my limit. ive got 25" of travel out of a 16" shock by having the mounting point of the shock closer to the pivot point than the linkage mounting point. for that same 25" of wheel travel im only using 11" of coilover.

in the one pic ive got the measurements im using. the linkage to the axle is 20" from the pivot point. the bypass shock is roughly 13.75" from the pivot point. the coilover is only 7.75" from the pivot point. when you do the math you get a ratio of 2.58:1 for the coilover. for the bypass it a ratio of 1.45:1. using this you can figure out what travel you will get out of X" of shock. for spring rates you can also use this ratio to figure out the heavier coils needed to compensate for the extra leverage on them from the bellcrank.

attachment

attachment
#9
Nice work! Is that multi-functional for crawling and trophy truck chasing? Did the wheelbase end up at 112"ish? I can't stop staring...8)
#10
yes i built it to be a true dual purpose rig. i do a ton of go fast exploring/camping so i had to have a setup that could handle itself in the woops and fast sections but itll still crawl great too. the WB actually ended up right at 117" a little longer than i was shooting for since i plan/planned to move the front axle forward. we'll see how it does, i might just leave it where its at and call it done.

Feel free to come by the new shop and see the setup in person. its much easier to comprehend it seeing it in front of you right there.
#11
Where's your shop at?
#12
Right next to AO.

Great looking rig, Chris. Absolutely amazing. Well done.
#13
through the hole in the wall. looking good since i last saw it. almost ready to practice crushing a white xj.
#14
Nice work, Looks like a fun rig!
#15
brotobeast wrote:through the hole in the wall. looking good since i last saw it. almost ready to practice crushing a white xj.


You rig couldn't hump a white XJ even if it had a bottle of wine and a pocket full of Rohypnol.

Have fun, GagaGagMe.

(are you almost ready to wheel again? I've got a couple of weekends that may open up and I want to see what you can do with those new axles. should be pretty sweet.)
#16
alanzona wrote:
(are you almost ready to wheel again? I've got a couple of weekends that may open up and I want to see what you can do with those new axles. should be pretty sweet.)


should be at the end of this month. andrew is getting back in town next week and then we will be getting started. still trying to find a front 44 for a tj. i am planning to maybe go out the 1st if i am not too worn out from gaga.
#17
Gotcha. I'm out of town next weekend and travel a lot in August, so I'm going to try and something up relatively soon.
#18
THREAD JACK!! Shame on you Alan. (I call shotgun when ya'll go out)


Chris, I'll have to swing by and take a look at it. Looks freakin awesome. I've never seen that set up before.
#19
im shakin it down next weekend early am in humbug creek.
#20
I might be down for that.